Cloudflare: Edge Markdown for AI Bots
Overview
This system intercepts AI crawler traffic (such as GPTBot, ClaudeBot, and PerplexityBot) at Cloudflare’s edge network and serves pre-rendered Markdown directly from Cloudflare Key-Value (KV) storage. Human traffic passes unchanged to the WP Engine origin server, ensuring zero origin server or database load for AI bot requests.
Traffic & Data Flow
- Human Request (
User-Agent: Mozilla/...): Worker ignores → Requests origin → Serves HTML. - AI Bot Request (
User-Agent: GPTBot): Worker intercepts → Queries KV by URL path → Serves raw Markdown. - Content Sync: Updating a WordPress post triggers
save_posthook → Must-Use (MU) plugin converts HTML to Markdown → Webhook posts payload to Worker (/_api/sync-markdown) → Worker writes directly to KV.
Deployment Guide
1. Create Cloudflare KV Storage
- Log into the Cloudflare Dashboard and navigate to Workers & Pages > KV.
- Click Create Namespace.
- Set the name to
MARKDOWN_STOREand click Add.
Verification: Confirm that MARKDOWN_STORE appears in your KV Namespace list with an assigned Namespace ID.

2. Deploy Cloudflare Worker Script
- Go to Workers & Pages > Overview > Create Application > Create Worker.
- Name the worker
ai-markdown-serverand deploy it. - Click Edit code and replace the default script with the following code:
const AI_BOT_USER_AGENTS = [
  'gptbot', 'chatgpt-user', 'claudebot', 'claude-web', 'anthropic-ai',
  'perplexitybot', 'cohere-ai', 'bytespider', 'google-extended', 'ccbot',
  'facebookexternalhit', 'diffbot', 'applebot-extended'
];

export default {
  async fetch(request, env, ctx) {
    const url = new URL(request.url);

    // 1. WEBHOOK ENDPOINT: Receives updates from WordPress
    if (request.method === 'POST' && url.pathname === '/_api/sync-markdown') {
      const authHeader = request.headers.get('X-Sync-Secret');
      if (!authHeader || authHeader !== env.SYNC_SECRET) {
        return new Response('Unauthorized', { status: 401 });
      }
      try {
        const body = await request.json();
        const { path, markdown, action } = body;
        if (!path) return new Response('Missing path', { status: 400 });
        if (action === 'delete') {
          await env.MARKDOWN_STORE.delete(path);
          return new Response('Deleted from KV', { status: 200 });
        }
        await env.MARKDOWN_STORE.put(path, markdown);
        return new Response('Saved to KV', { status: 200 });
      } catch (err) {
        return new Response('Invalid Payload', { status: 400 });
      }
    }

    // 2. BOT INTERCEPTION: Serve Markdown to AI crawlers
    if (request.method !== 'GET' && request.method !== 'HEAD') {
      return fetch(request);
    }

    const userAgent = (request.headers.get('user-agent') || '').toLowerCase();
    const accept = (request.headers.get('accept') || '').toLowerCase();
    const isBot = AI_BOT_USER_AGENTS.some(bot => userAgent.includes(bot)) || accept.includes('text/markdown');

    if (isBot) {
      const markdown = await env.MARKDOWN_STORE.get(url.pathname);
      if (markdown !== null) {
        return new Response(markdown, {
          status: 200,
          headers: {
            'Content-Type': 'text/markdown; charset=utf-8',
            'Cache-Control': 'public, max-age=3600',
            'Vary': 'User-Agent, Accept'
          }
        });
      }
    }

    // 3. HUMAN TRAFFIC: Pass straight to WP Engine origin
    return fetch(request);
  }
};- Click Save and Deploy.
Verification: Select the worker link to verify that the script compiles and deploys without runtime syntax errors.
3. Configure Worker Variables & KV Bindings
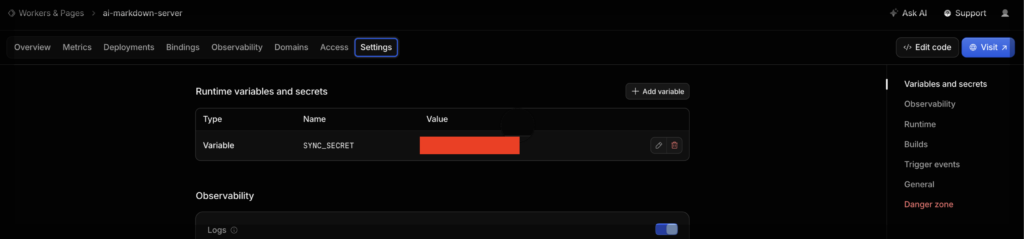
- Navigate to Workers & Pages >
ai-markdown-server> Settings. - Under Runtime variables and secrets, click + Add variable. Name it
SYNC_SECRETand set the value to your secret passphrase (e.g.,wp-sync-sec-6942067). - Click the Bindings tab in the top navigation bar.
- Click Add binding, select KV Namespace, set the variable name to
MARKDOWN_STORE, and select theMARKDOWN_STOREnamespace. - Save changes.
Verification: Confirm MARKDOWN_STORE appears under the Bindings tab and SYNC_SECRET is displayed under Runtime Variables.

4. Install WordPress MU-Plugin
- SSH to WP Engine.
- Navigate to
/wp-content/mu-plugins/mu-plugins. - Create a file named
cf-kv-sync.phpand paste the following PHP code:
<?php
/*
Plugin Name: Cloudflare KV Markdown Sync (MU)
Description: Automatically syncs published post content as Markdown to Cloudflare KV storage via Worker webhook.
Version: 1.1
*/

// MUST match the SYNC_SECRET set in Cloudflare Worker settings
define('CF_SYNC_SECRET', 'xxxx-xxxx-xxxx-xxxx');

add_action('save_post', 'cf_send_markdown_webhook', 10, 3);
add_action('before_delete_post', 'cf_delete_markdown_webhook');

function cf_html_to_markdown($html) {
    $html = apply_filters('the_content', $html);

    // Convert headers
    $html = preg_replace('/<h[1-6][^>]*>(.*?)<\/h[1-6]>/is', "\n\n## $1\n\n", $html);

    // Convert paragraphs & line breaks
    $html = preg_replace('/<p[^>]*>(.*?)<\/p>/is', "\n\n$1\n\n", $html);
    $html = preg_replace('/<br\s*\/?>/i', "\n", $html);

    // Convert formatting
    $html = preg_replace('/<(strong|b)[^>]*>(.*?)<\/(strong|b)>/is', "**$2**", $html);
    $html = preg_replace('/<(em|i)[^>]*>(.*?)<\/(em|i)>/is', "*$2*", $html);

    // Convert links
    $html = preg_replace('/<a[^>]+href="([^"]+)"[^>]*>(.*?)<\/a>/is', "[$2]($1)", $html);

    $text = strip_tags($html);
    return trim(preg_replace("/\n{3,}/", "\n\n", $text));
}

function cf_send_markdown_webhook($post_id, $post, $update) {
    if (wp_is_post_revision($post_id) || wp_is_post_autosave($post_id) || $post->post_status !== 'publish') return;

    $permalink = get_permalink($post_id);
    $path = wp_make_link_relative($permalink);
    if (!$path) return;

    $markdown = "# " . $post->post_title . "\n\n" . cf_html_to_markdown($post->post_content);
    $site_url = get_option('home');

    wp_remote_post($site_url . '/_api/sync-markdown', array(
        'headers' => array(
            'Content-Type' => 'application/json',
            'X-Sync-Secret' => CF_SYNC_SECRET,
        ),
        'body' => json_encode(array(
            'path' => $path,
            'markdown' => $markdown,
            'action' => 'save'
        )),
        'timeout' => 5,
    ));
}

function cf_delete_markdown_webhook($post_id) {
    $permalink = get_permalink($post_id);
    $path = wp_make_link_relative($permalink);
    if (!$path) return;

    $site_url = get_option('home');

    wp_remote_post($site_url . '/_api/sync-markdown', array(
        'headers' => array(
            'Content-Type' => 'application/json',
            'X-Sync-Secret' => CF_SYNC_SECRET,
        ),
        'body' => json_encode(array(
            'path' => $path,
            'action' => 'delete'
        )),
        'timeout' => 5,
    ));
}
Verification: Log into WordPress Admin, go to Plugins > Must-Use, and confirm Cloudflare KV Markdown Sync (MU) is listed as active.
5. Bind Worker Route to Domain:
- In the Cloudflare Dashboard, select your website domain.
- Go to Workers Routes (under Rules or DNS).
- Click Add route.
- Set Route to
yourdomain.com/*. - Select
ai-markdown-serverunder Worker and click Save.
Verification: Confirm yourdomain.com/* is displayed as an active route linked to ai-markdown-server.

6. End-to-End System Testing
- Trigger Sync: Update an existing post in WordPress Admin.
- Verify KV Entry: Check Cloudflare > KV > MARKDOWN_STORE to verify a key matching your post path holds the Markdown content.
Test Method A: Terminal (CLI)
- Open your terminal and run:
curl -A "GPTBot" https://yourdomain.com/your-post-path/Result: The terminal should output plain Markdown text.

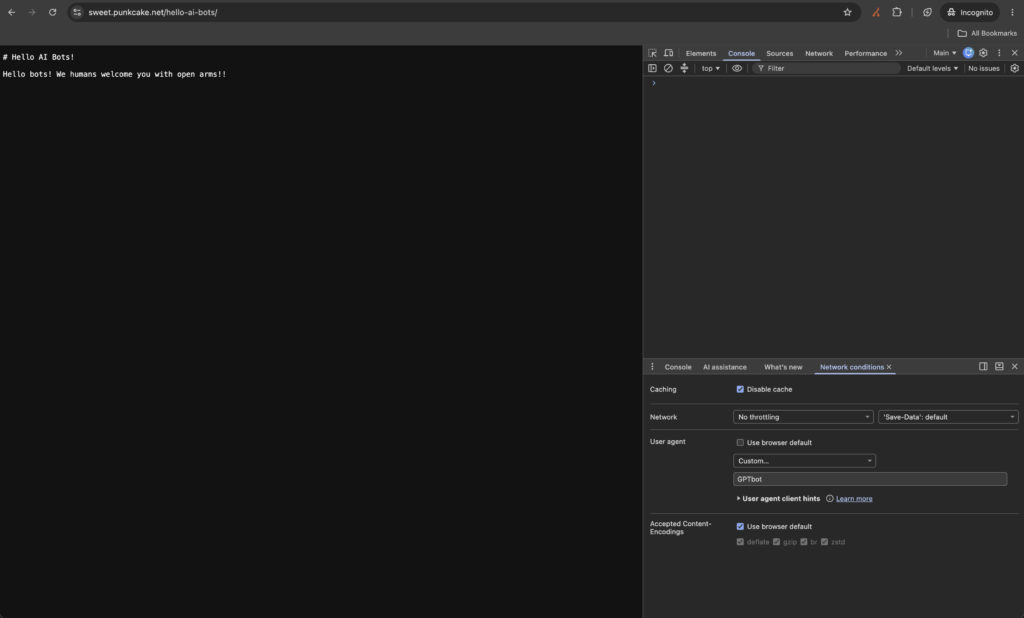
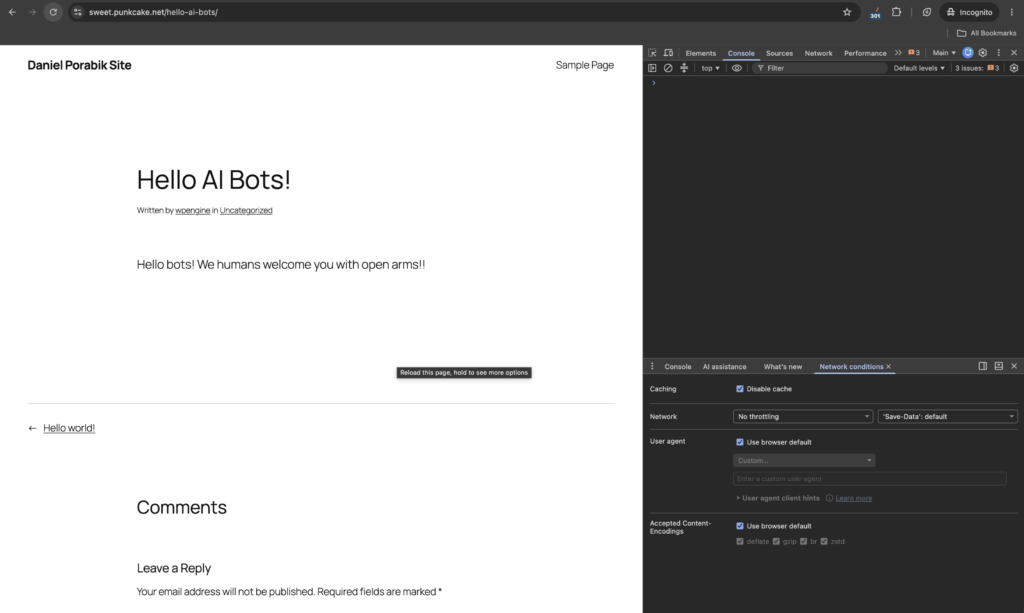
Test Method B: Browser (Chrome DevTools)
- Open your post URL in Google Chrome.
- Right-click anywhere and select Inspect (or press
F12/Cmd+Option+I). - In DevTools, click the three vertical dots (top-right) > More tools > Network conditions.
- In the new bottom panel, under the User agent section, uncheck Use browser default.
- Select Custom… from the dropdown and paste
GPTBotinto the text box. - Keep the DevTools panel open and refresh the page. Result: The browser should display the raw Markdown text payload instead of the standard HTML layout.
Appendix: Bulk Syncing Existing Content
If you are deploying this system to an existing site, your historical posts and pages will not automatically appear in Cloudflare KV until they are saved again. Use one of the following methods to perform a mass sync of your existing content.
Method A: The WordPress Bulk Edit Trick (For Small to Medium Sites)
This method is easiest for sites with fewer than a few hundred posts and requires no technical access.
- Navigate to Posts > All Posts in the WordPress Admin dashboard.
- Click Screen Options (top right) and change Number of items per page to
100or higher, then click Apply. - Check the master checkbox in the table header to select all visible posts.
- From the Bulk actions dropdown, select Edit and click Apply.
- The Bulk Edit panel will open. Do not modify any settings.
- Click the Update button. WordPress will process every selected post, triggering the webhook and syncing them to Cloudflare KV.
- Repeat these steps for your Pages.
Method B: WP-CLI (For Large Sites)
For sites with thousands of posts, the browser-based bulk edit may time out. Use WP Engine’s SSH access to run a bulk update via the command line.
- Connect to your WP Engine environment via SSH (credentials are found in your WP Engine portal).
- To sync all published Posts, run:
wp post update $(wp post list --post_type=post --post_status=publish --format=ids) - To sync all published Pages, run:
wp post update $(wp post list --post_type=page --post_status=publish --format=ids)
Found this useful?
There's more where that came from — explore the rest of the documentation, experiments, and production work.
→ Back to the index